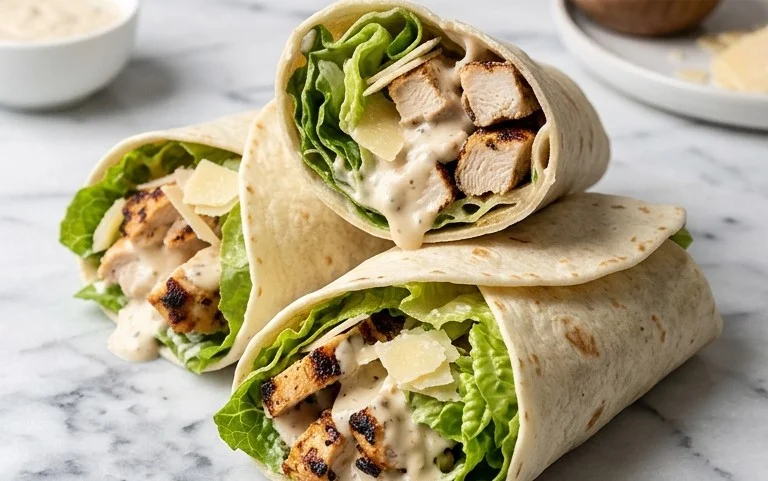
Fun Non-Sandwich Lunch Ideas for Kids
Non sandwich lunch ideas for kids are a lifesaver when lunch fatigue sets in! We all know the struggle: your little ones get bored of the same old beef ham and cheese, or maybe they’re looking for something a little more exciting than a classic PB&J. That’s where a fantastic repertoire of non sandwich lunch ideas for kids truly shines. Parents love these options because they offer variety, introduce new flavors and textures, and often sneak in extra nutrients without a fuss. What makes these non sandwich lunch ideas for kids so special is their versatility and the sheer joy they bring to mealtime. Imagine vibrant bowls, fun skewers, or comforting bakes that transform the midday meal from a chore into a delightful adventure. Let’s dive into some creative and kid-approved recipes that will banish lunchbox boredom forever!

Non-Sandwich Lunch Ideas for Kids
Tired of the same old sandwich routine? I get it! Sometimes, packing lunches for the little ones can feel like a creative drought, especially when you want to offer something exciting and nutritious that isn’t just bread and fillings. As a parent myself, I’m always on the hunt for lunchbox heroes that are both kid-approved and relatively easy to prepare. This collection of non-sandwich lunch ideas is designed to break the bread barrier and introduce some delicious variety into your child’s midday meal. We’ll explore options that are fun to eat, packed with good-for-you ingredients, and surprisingly simple to assemble. From colorful pasta salads to protein-packed wraps and savory muffins, there’s something here to spark joy (and appetite!) in even the pickiest eaters. Let’s dive into some lunchbox inspiration that goes beyond the usual suspects!
Lunchbox Pasta Salad with Colorful Veggies and Chicken
This pasta salad is a vibrant and satisfying option that’s perfect for packing. It’s a great way to sneak in extra vegetables, and the chicken provides a good source of protein to keep little ones energized throughout the afternoon.
Ingredients:
- 1 cup cooked rotini pasta, cooled
- 1/2 cup cooked shredded chicken
- 1/4 cup finely chopped cucumber
- 1/4 cup finely chopped red bell pepper
- 1/4 cup frozen peas, thawed
- 2 tablespoons grated cheddar cheese
- 2 tablespoons mayonnaise or Greek yogurt
- 1 teaspoon lemon juice
- Salt and black pepper to taste
Cooking Instructions:
1.
Prepare the Pasta and Chicken:
First, cook your rotini pasta according to the package directions until it’s al dente. You don’t want it mushy, as it will continue to soften slightly in the dressing. Once cooked, drain the pasta thoroughly and rinse it under cold water. This stops the cooking process and helps prevent it from clumping together in the lunchbox. If you haven’t already, cook and shred your chicken. I usually boil or bake a chicken breast and then shred it with two forks. Ensure both the pasta and chicken are completely cooled before assembling the salad. This is crucial for food safety and to prevent the other ingredients from becoming warm and unappetizing.
2.
Chop and Thaw the Veggies:
While the pasta and chicken are cooling, prepare your vegetables. Finely chop the cucumber and red bell pepper. The smaller the pieces, the easier it will be for kids to eat, and they’ll distribute more evenly throughout the salad. For the peas, if using frozen, simply place them in a small bowl and let them thaw at room temperature for about 15-20 minutes, or rinse them under cool water. Ensure they are completely thawed and drained.
3.
Assemble the Salad Base:
In a medium-sized bowl, combine the cooled rotini pasta, shredded chicken, chopped cucumber, chopped red bell pepper, and thawed peas. Gently toss these ingredients together to distribute them evenly.
4.
Make the Dressing and Combine:
In a separate small bowl, whisk together the mayonnaise or Greek yogurt (Greek yogurt is a lighter, protein-rich alternative), lemon juice, salt, and pepper. The lemon juice adds a little brightness and helps to cut through the richness of the dressing. Taste the dressing and adjust seasonings as needed. Pour the dressing over the pasta and vegetable mixture. Add the grated cheddar cheese.
5.
Mix and Chill:
Gently toss everything together until all the ingredients are well coated with the dressing and the cheese is evenly distributed. Be careful not to overmix, which can make the pasta break down. Once thoroughly combined, cover the bowl tightly with plastic wrap or transfer the pasta salad to an airtight container. Refrigerate for at least 30 minutes before packing. This allows the flavors to meld together and ensures the salad is nice and cool for lunchtime. When packing, you can add a small container of crackers or a few carrot sticks on the side.
Mini Chicken and Cheese Quesadillas
These mini quesadillas are always a hit! They’re soft, cheesy, and easy for little hands to hold and eat. Plus, they can be made ahead of time and reheated, or even enjoyed cold.
Ingredients:
- 4 small whole wheat tortillas
- 1/2 cup shredded cooked chicken
- 1/2 cup shredded cheddar or Monterey Jack cheese
- 1 tablespoon finely chopped cooked spinach (optional)
- Butter or cooking spray for cooking
Cooking Instructions:
1.
Prepare Your Filling:
In a medium bowl, combine the shredded cooked chicken and the shredded cheese. If you’re using spinach, make sure it’s finely chopped and well-drained if it was cooked in water. You want to avoid excess moisture, which can make the quesadillas soggy. Stir everything together to create your filling mixture.
2.
Assemble the Quesadillas:
Lay out two of the small whole wheat tortillas on a clean surface. Sprinkle half of the chicken and cheese mixture evenly over one half of each tortilla. This makes it easier to fold them into semi-circles. Don’t overfill, or the quesadillas will be difficult to fold and cook evenly.
3.
Fold and Cook:
Fold the unfilled half of each tortilla over the filling to create a semi-circle. Lightly grease a non-stick skillet or griddle with a little butter or cooking spray and heat it over medium heat. Carefully place the folded quesadillas onto the hot skillet. Cook for 2-3 minutes per side, or until the tortillas are golden brown and crispy, and the cheese is melted and gooey.
4.
Cut and Cool:
Once cooked, carefully remove the quesadillas from the skillet and place them on a cutting board. Let them cool for a few minutes before cutting them into wedges or smaller “pizza-like” triangles. This makes them easier for kids to handle and eat. If you’re packing them for lunch the next day, allow them to cool completely before storing them in an airtight container in the refrigerator.
5.
Packing Tips:
For a complete lunch, pack these mini quesadillas with some salsa for dipping (if your child enjoys it), a side of fruit like sliced apples or grapes, and a small container of guacamole or sour cream. They can be enjoyed warm or at room temperature.
Savory Oatmeal Muffins
Who says oatmeal is just for breakfast? These savory muffins are a delightful and unexpected lunchbox treat. They’re packed with wholesome ingredients and are easily customizable to suit your child’s preferences.
Ingredients:
- 1 cup rolled oats
- 1 cup all-purpose flour
- 1 teaspoon baking powder
- 1/2 teaspoon salt
- 1/4 teaspoon black pepper
- 1/4 cup grated cheddar cheese
- 2 tablespoons finely chopped cooked broccoli or spinach
- 1 large egg
- 3/4 cup milk
- 1/4 cup vegetable oil or melted butter
Cooking Instructions:
1.
Preheat and Prepare Muffin Tin:
Begin by preheating your oven to 375°F (190°C). Line a 12-cup muffin tin with paper liners or grease it well. This prevents the muffins from sticking and makes cleanup a breeze.
2.
Combine Dry Ingredients:
In a large mixing bowl, whisk together the rolled oats, all-purpose flour, baking powder, salt, and black pepper. Make sure these dry ingredients are well combined to ensure even leavening and distribution of seasoning. Stir in the grated cheddar cheese and the finely chopped cooked vegetables. For the vegetables, ensure they are finely chopped and have had any excess moisture squeezed out, especially if you used frozen spinach.
3.
Combine Wet Ingredients:
In a separate medium bowl, whisk together the egg, milk, and vegetable oil (or melted butter). The liquid ingredients will bind everything together and contribute to the moistness of the muffins.
4.
Combine Wet and Dry Mixtures:
Pour the wet ingredients into the bowl with the dry ingredients. Stir gently until just combined. Be careful not to overmix; overmixing can result in tough muffins. A few lumps are perfectly fine.
5.
Fill and Bake:
Spoon the batter evenly into the prepared muffin cups, filling each about two-thirds full. Place the muffin tin in the preheated oven and bake for 18-22 minutes, or until a toothpick inserted into the center of a muffin comes out clean. The tops should be golden brown and slightly firm to the touch.
6.
Cool and Pack:
Once baked, remove the muffins from the oven and let them cool in the muffin tin for a few minutes before transferring them to a wire rack to cool completely. These savory muffins are delicious served warm or at room temperature. They can be packed with a side of fruit or yogurt for a complete and satisfying lunch.
These ideas are just a starting point, of course! Feel free to adapt them with your child’s favorite flavors and ingredients. The key is to offer variety and make lunchtime something to look forward to, moving beyond the predictable sandwich. Happy packing!

Conclusion:
I hope you’re feeling inspired to ditch the sandwich rut and explore these fantastic non sandwich lunch ideas for kids! These recipes are brilliant because they’re packed with nutritious ingredients, offer a variety of flavors and textures to keep little ones engaged, and are surprisingly easy to assemble, even on busy mornings. We’ve covered everything from savory bento boxes filled with colorful veggies and lean protein to hearty grain bowls and fun pasta salads. Remember, the beauty of these ideas is their flexibility! Don’t be afraid to adapt them to your child’s preferences or what you have on hand. Swap out vegetables, try different types of pasta, or experiment with various dips and dressings. The key is to make lunchtime exciting and balanced. So, go ahead, give these a try and watch your kids happily munch away!
Frequently Asked Questions:
Q: How can I make these lunches more exciting for picky eaters?
A: For picky eaters, start with familiar flavors and gradually introduce new ones. You can also make lunch fun by letting them help assemble their own “bento” or by using cookie cutters to create fun shapes from fruits, veggies, or even cheese. Presenting food in colorful and appealing ways can also make a big difference.
Q: Can these lunches be prepped ahead of time?
A: Absolutely! Many of these recipes are perfect for meal prepping. You can chop vegetables, cook grains, and prepare proteins the night before. Store components separately in airtight containers and assemble them in the morning. This significantly reduces morning stress and ensures a healthy lunch is always ready.
Q: What are some good ways to include healthy fats in these non sandwich lunch ideas?
A: Incorporating healthy fats is easy! Consider adding avocado slices to wraps or bowls, a sprinkle of seeds like chia or sunflower seeds, or a small portion of nuts (if age-appropriate and no allergies). Drizzling a vinaigrette made with olive oil over salads or grain bowls also adds a healthy dose of fat.
Non-Sandwich Lunch Ideas for Kids
Creative and satisfying lunch options for kids that don’t involve sandwiches, perfect for back to school or any day.
Ingredients
-
1 cup cooked pasta
-
1/2 cup diced chicken breast
-
1/4 cup shredded carrots
-
1/4 cup chopped broccoli florets
-
2 tablespoons pesto
-
1/4 cup cherry tomatoes, halved
Instructions
-
Step 1
Cook pasta according to package directions. Drain and rinse with cold water. -
Step 2
In a bowl, combine cooked pasta, diced chicken breast, shredded carrots, and chopped broccoli florets. -
Step 3
Add pesto to the pasta mixture and toss to combine evenly. -
Step 4
Gently fold in the halved cherry tomatoes. -
Step 5
Portion the pasta salad into individual lunch containers. -
Step 6
Chill until ready to serve for a refreshing and complete meal.
Important Information
Nutrition Facts (Per Serving)
It is important to consider this information as approximate and not to use it as definitive health advice.
Allergy Information
Please check ingredients for potential allergens and consult a health professional if in doubt.